Watch a Seed Grow
- Easy
- A Bit Messy
- 15 Minutes a day; 1 week
- Indoor or Outdoor
Explore the Stages of Seed Growth
When seeds are in the soil, it is impossible to observe all of the stages of growth. Use fast-growing seeds in this experiment, and you and your child can closely monitor all of the stages of growth a seed experiences!
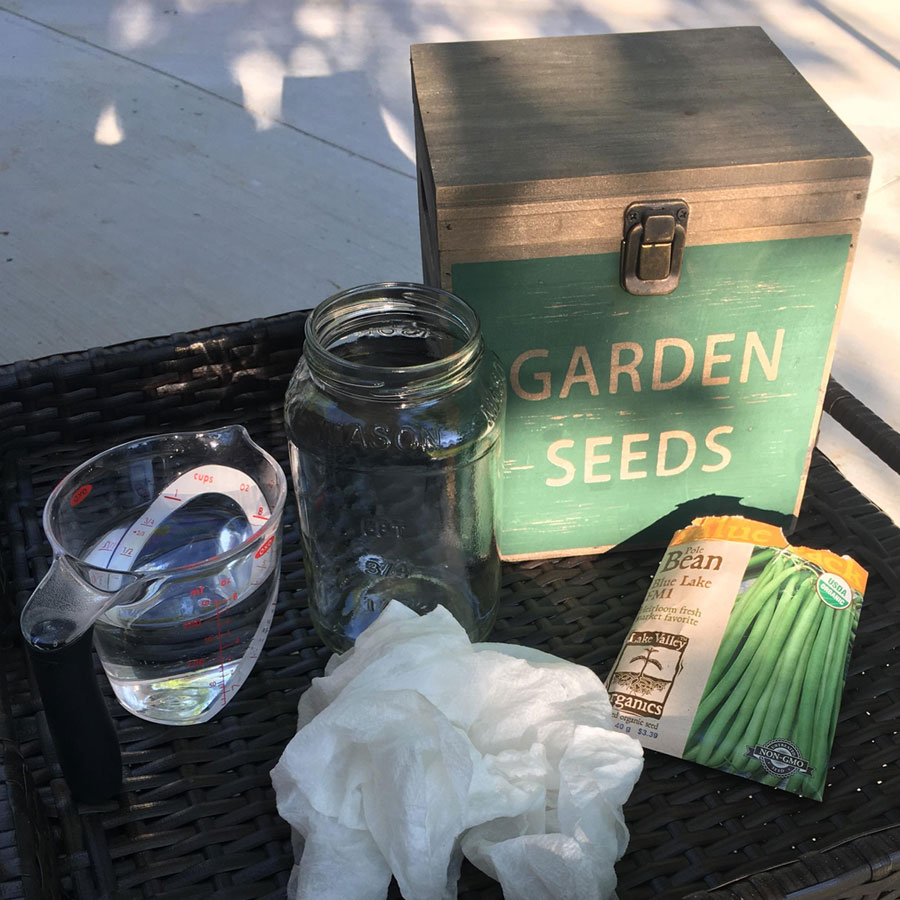
You Will Need
3 or 4 seeds; any kind will work, but the following grow the fastest: marigold, sunflower, radish, squash, pumpkin, beans, and peas
Paper towels
Clear container (a glass jar or clear plastic cup work well)
Water
Directions
- Line the bottom of the container with paper towels. Do not make the paper towels too thick or they will block light coming into the container.
- Place 3 or 4 seeds between the towels and the container so you can see them through the sides of the container.
- Keep the paper towels damp (but not soaked) by adding a little bit of water to the bottom of the container. (Note: The paper towels only need to be damp, if they are still damp the next day, don’t water the seeds again until they need it. Too much water will cause the seeds to rot.)
- Check the seeds every day for signs of growth.
- Within a week the seeds should begin to grow.
- As the plant grows you can chart the progress. Take a photograph or have your child draw a picture of what the seed looks like each day. Older children can draw a tally chart or bar graph to compare the growth of two or three seeds.
- The first parts you will see are the roots peeking out from the bottom of the seeds. Eventually, you will see a stem emerge with the plant’s first leaves. These leaves start the photosynthesis process, allowing the plant to grow up strong.
Experiment Extensions
- If it is Spring or Summer, you can plant the seeds outside when the plants are about 2 inches tall. Just make sure the temperature (including at night) does not get too cold or the plants will go into shock and die when they are moved outdoors. Alternatively, you can plant them in pots inside that are filled with soil, and set them on a sunny windowsill.
How it works
Seeds need light and moisture to start growing. Most can start to grow without the presence of soil. The first part you will see observe from the seed is the embryonic root. This root helps the plant suck water up into the seed, allowing for leaves to emerge. Once the first leaf emerges, the plant can begin photosynthesizing or creating food to support the rest of the growth process.
Key Words
- Embryonic Root
- The first thing that emerges from a seed, allowing the seed to soak up water to use for further growth. It is stored in the seed and activated for growth when the seed is placed in a warm, moist growth environment.
- First Leaves
- Often the stem and first leaves are the second things to emerge from a seed. These leaves are tiny and often do not look like the plant’s future leaves.
- Leaf
- One of the most important parts of a plant, the leaves produce food for the plant through a process called photosynthesis.
- Photosynthesis
- The process plants use to make food using light, water, and nutrients from the soil and air.
- Seed
- The small parts produced by a plant from which new plants grow.
- Stem
- The part of a plant that holds up the leaves and flowers of a plant, as well as grows over the roots in the ground. The stem plays an important role in bringing water and nutrients up and down the plant.
- True Leaves
- The actual leaves of the plant that emerge after the first leaves. These leaves will grow with a plant for most of its life and can be used to identify the plant by their unique shapes.